In the last blog, we discussed the basics of Docker and how to start using Docker. You can read the blog here. Today we will discuss how to create and run your container image in Docker. Let’s get started.
Docker Desktop is one of the easiest ways to start running a container. You can install docker from their official website.
Running Your First Own Container Images in Docker Desktop
Docker desktop gives you a straightforward way to use any Docker image and run a container.
You can choose to use any image. To start with, we advise you to take an image from Docker Hub. As discussed in the previous blog, Docker Hub is a public repository of Docker images that are verified by millions of users and hence safe to use.
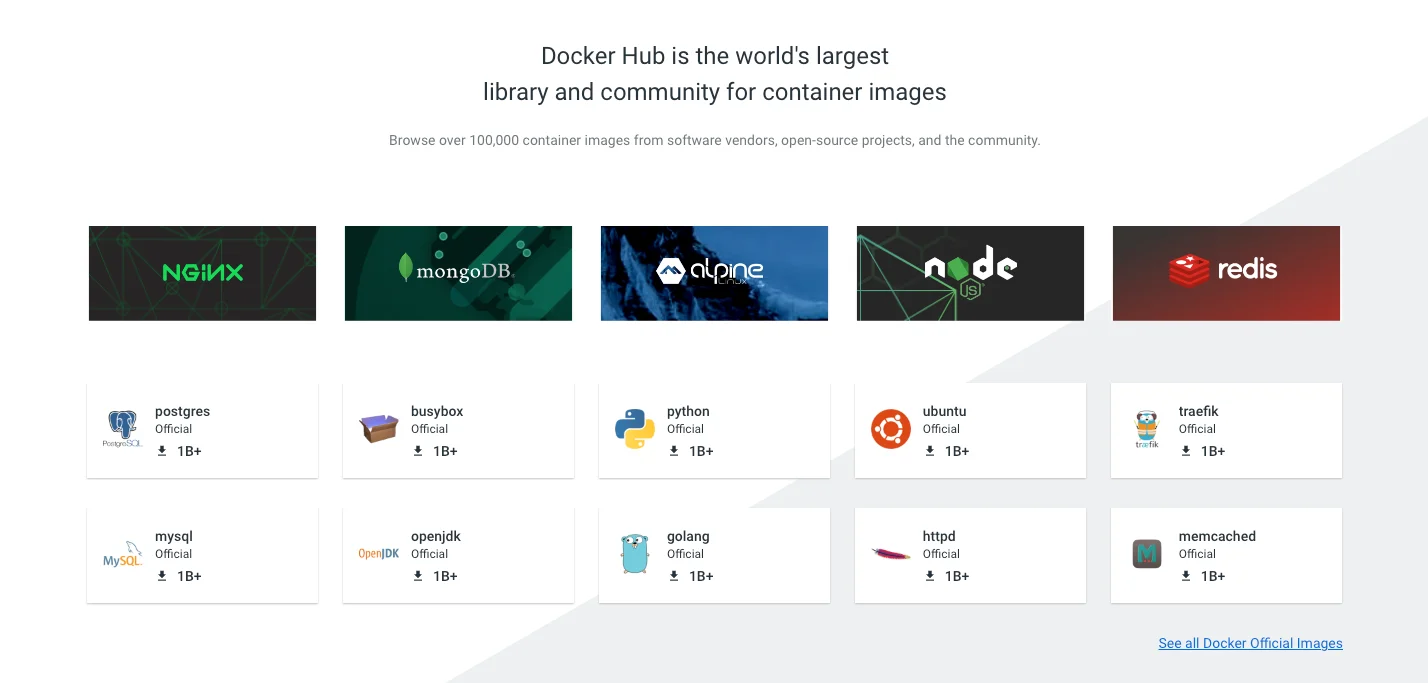
You can use these images and build your own on top of it. For this blog, we will use Docker’s own “getting started” image from Docker Hub.
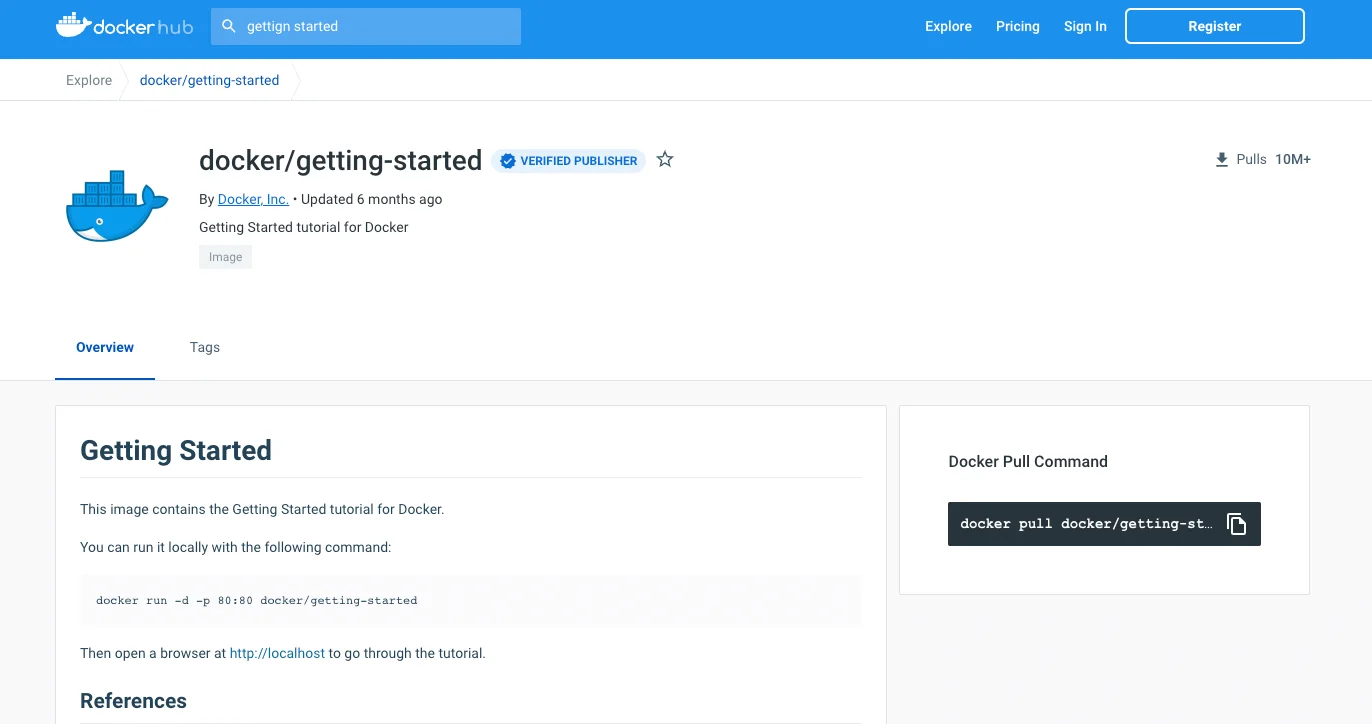
Docker Desktop – Getting started image
Installing Docker desktop from the website installs all essential binaries needed to run both UI and command line.
To pull the image from Docker Hub you can use the pull command on your terminal:
$ docker pull docker/getting-started
Or you can run the container with a single docker run command.

We explain these commands in greater detail in our previous Docker blog here. If you not comfortable with using the terminal, you can use Docker Desktop to do the same thing.
Register on Docker Hub
By default, Docker Desktop uses Docker Hub to download images. You can, of course, configure other registries to download images from.
But before you download repositories from Docker Hub, you need to register and login to the Hub.
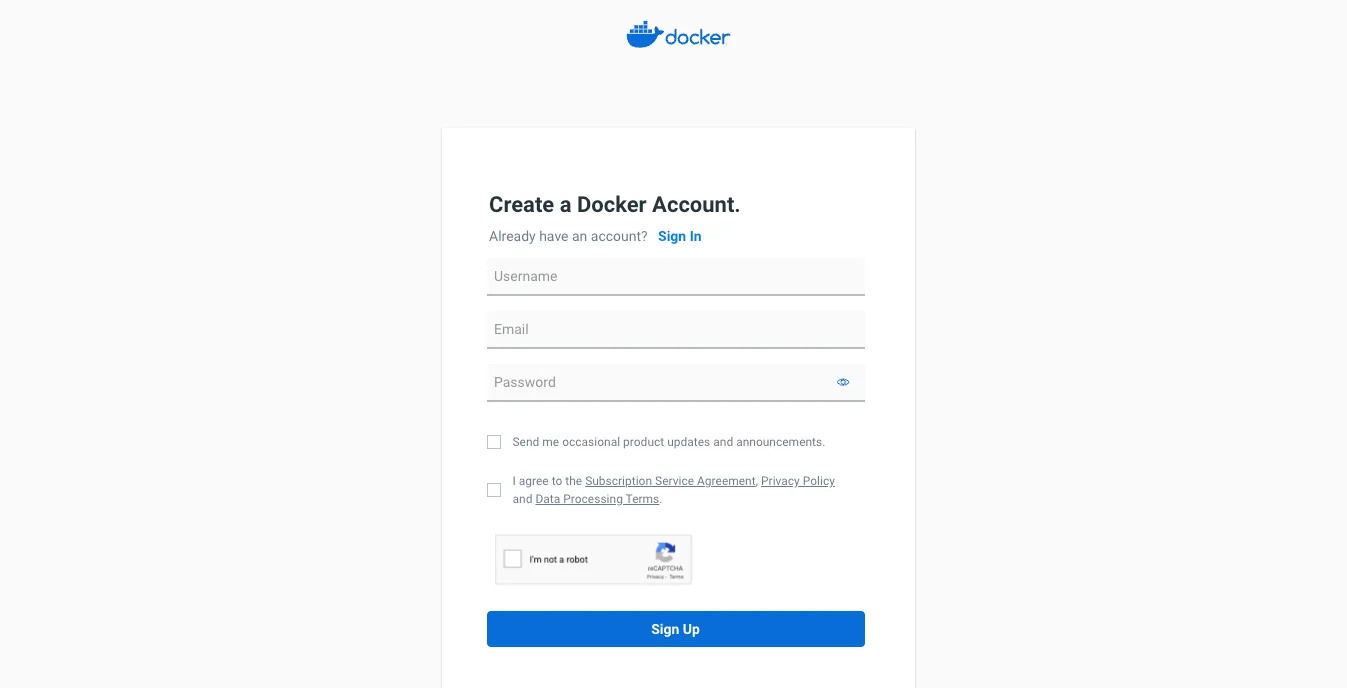
Although the getting-started image can be accessed from Github without registration, it is a good idea to register on Docker Hub portal to access many of the stable versions of Docker images for free.
When you start Docker Desktop, it will start a tutorial on how to run the getting-started docker image. In the below steps, we will also tell you how to do the same on command line as well.
The steps are similar for running any docker image from a Git repository. In the end, we will also tell you how to download any Docker image from Docker Hub.
How to run a docker image from GitHub
Step 1: Clone the repository
The GitHub repository we will use is this.
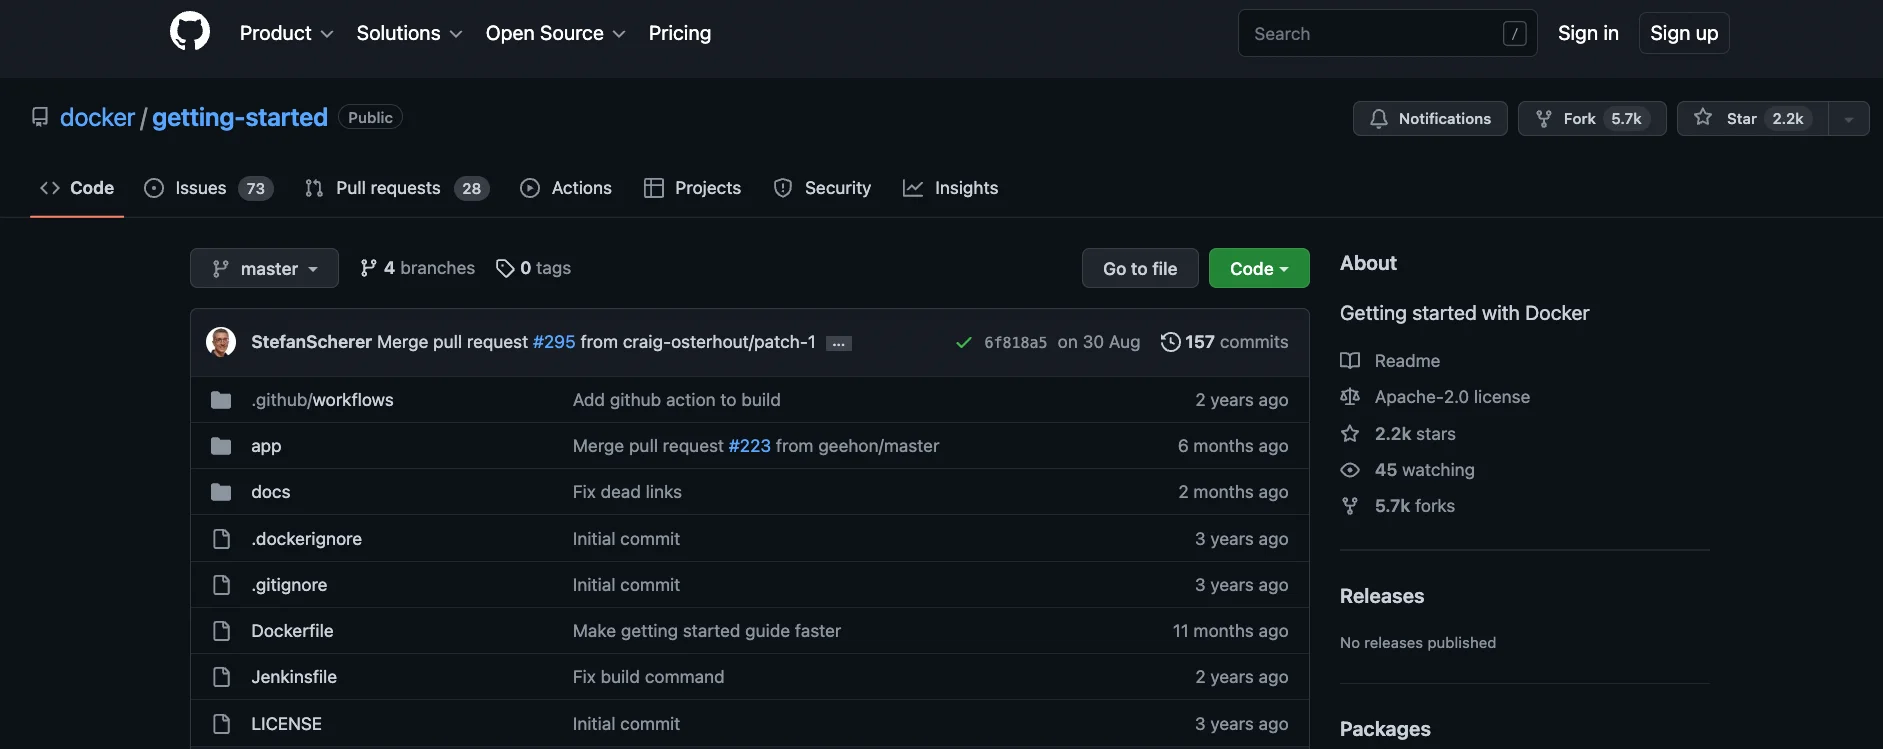
The Docker Desktop tutorial will automatically open a terminal on the side and let you run the command there.
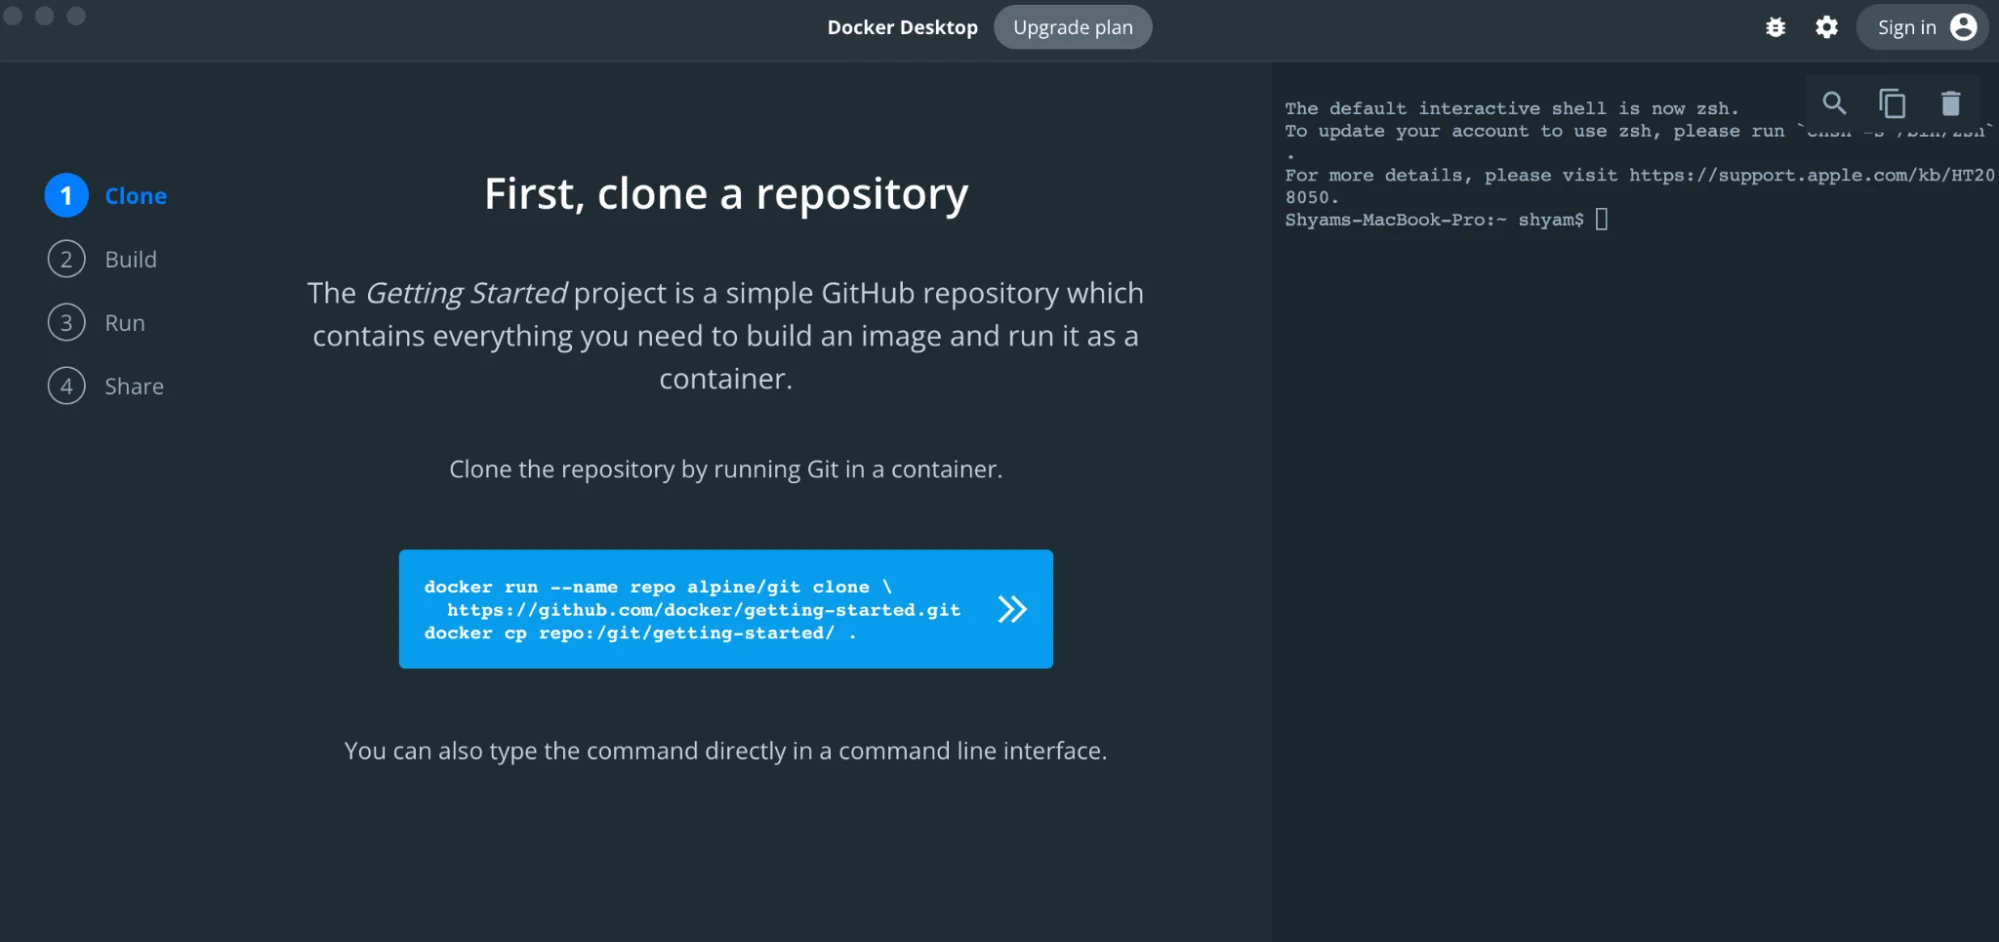
If you are not running the Docker Tutorial, you can open a terminal on your machine and run the below commands to download the GitHub repository.
$ docker run –name repo alpine/git clone https://github.com/docker/getting-started.git
$ docker cp repo:/git/getting-started/ .
These commands will basically copy the repository locally into our machine. Next, we need to build a docker image from the repository. Let’s see how to do it.
Step 2: Build the docker image
If you are running Docker Desktop, it will take you to the next step that builds a docker image from the repository. Click on the blue icon to copy the commands to the adjacent terminal.

You can do the same on command line by running the below commands:
$ cd getting-started
This command will take you inside the local directory “getting-started”.
$ docker build -t docker101tutorial .
Docker build command helps create a docker image called docker101tutorial. This command reads the docker file inside the directory to know what to create in the image.
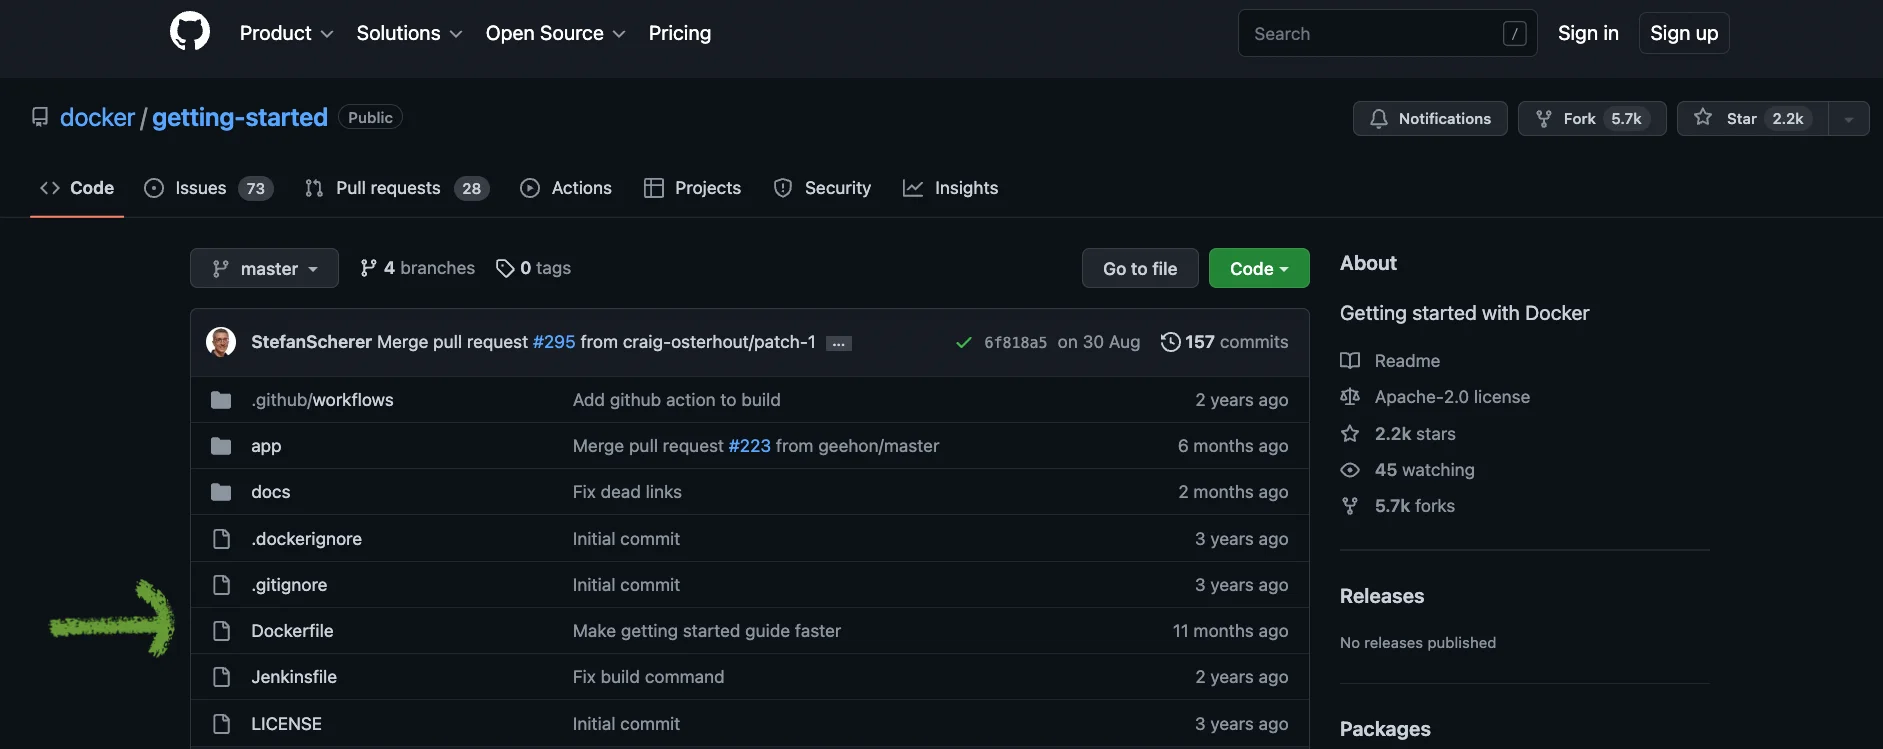
Here’s a snippet of the Docker file in the getting-started repository.
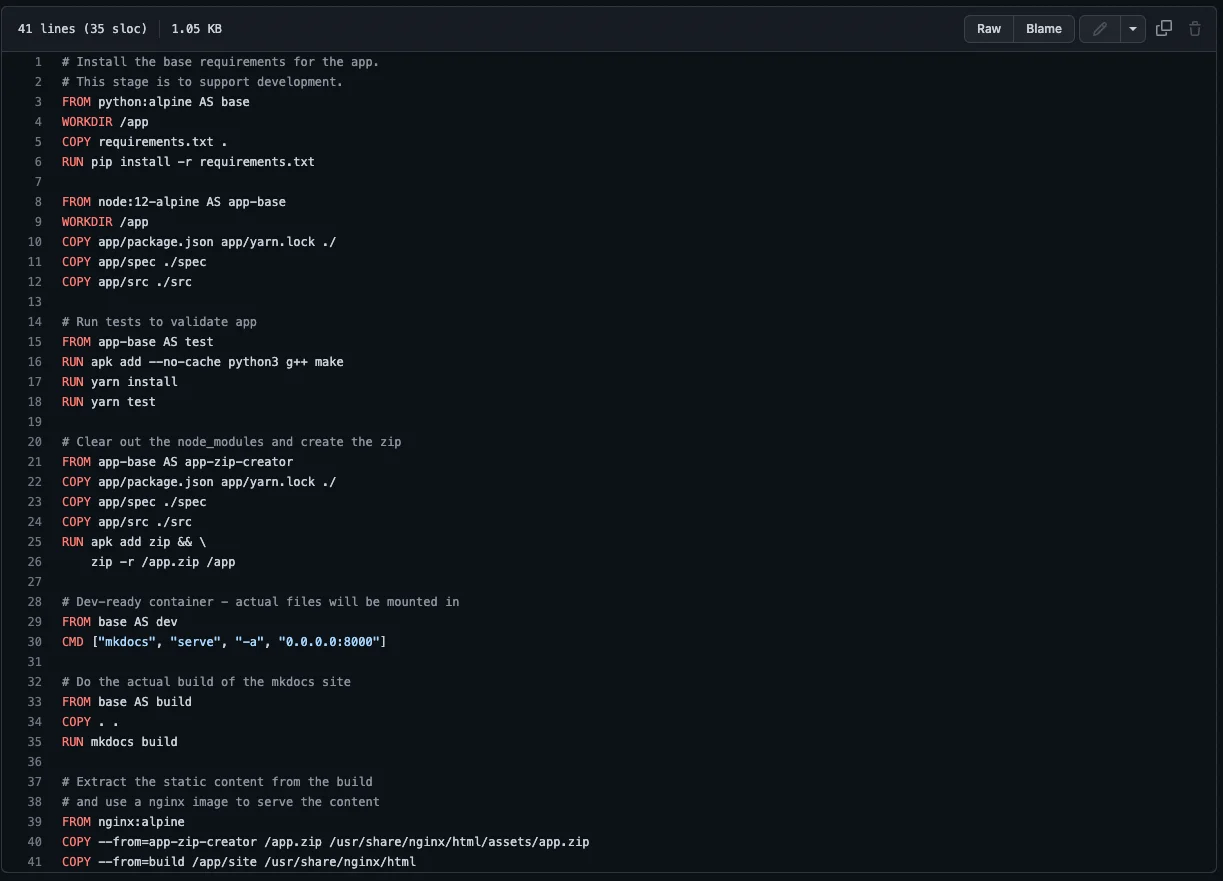
The Docker file helps in getting the necessary binaries to build a self-sufficient image. You can see the comments on the Dockerfile to understand which section does what. If you notice the last part set ups an nginx server to host static content.
The containerized application eventually installs an application server and hosts some static content. Sections above that mentions all dependencies and gathers them to build the image.
Let’s now try and run this image and see how the application comes up.
Step 3: Run the docker container
The next step is to run the container from the image. Docker run command will run a container based on the image and launch the application in it.
You can click on the blue button to make Docker desktop run the command on the right side of the screen.
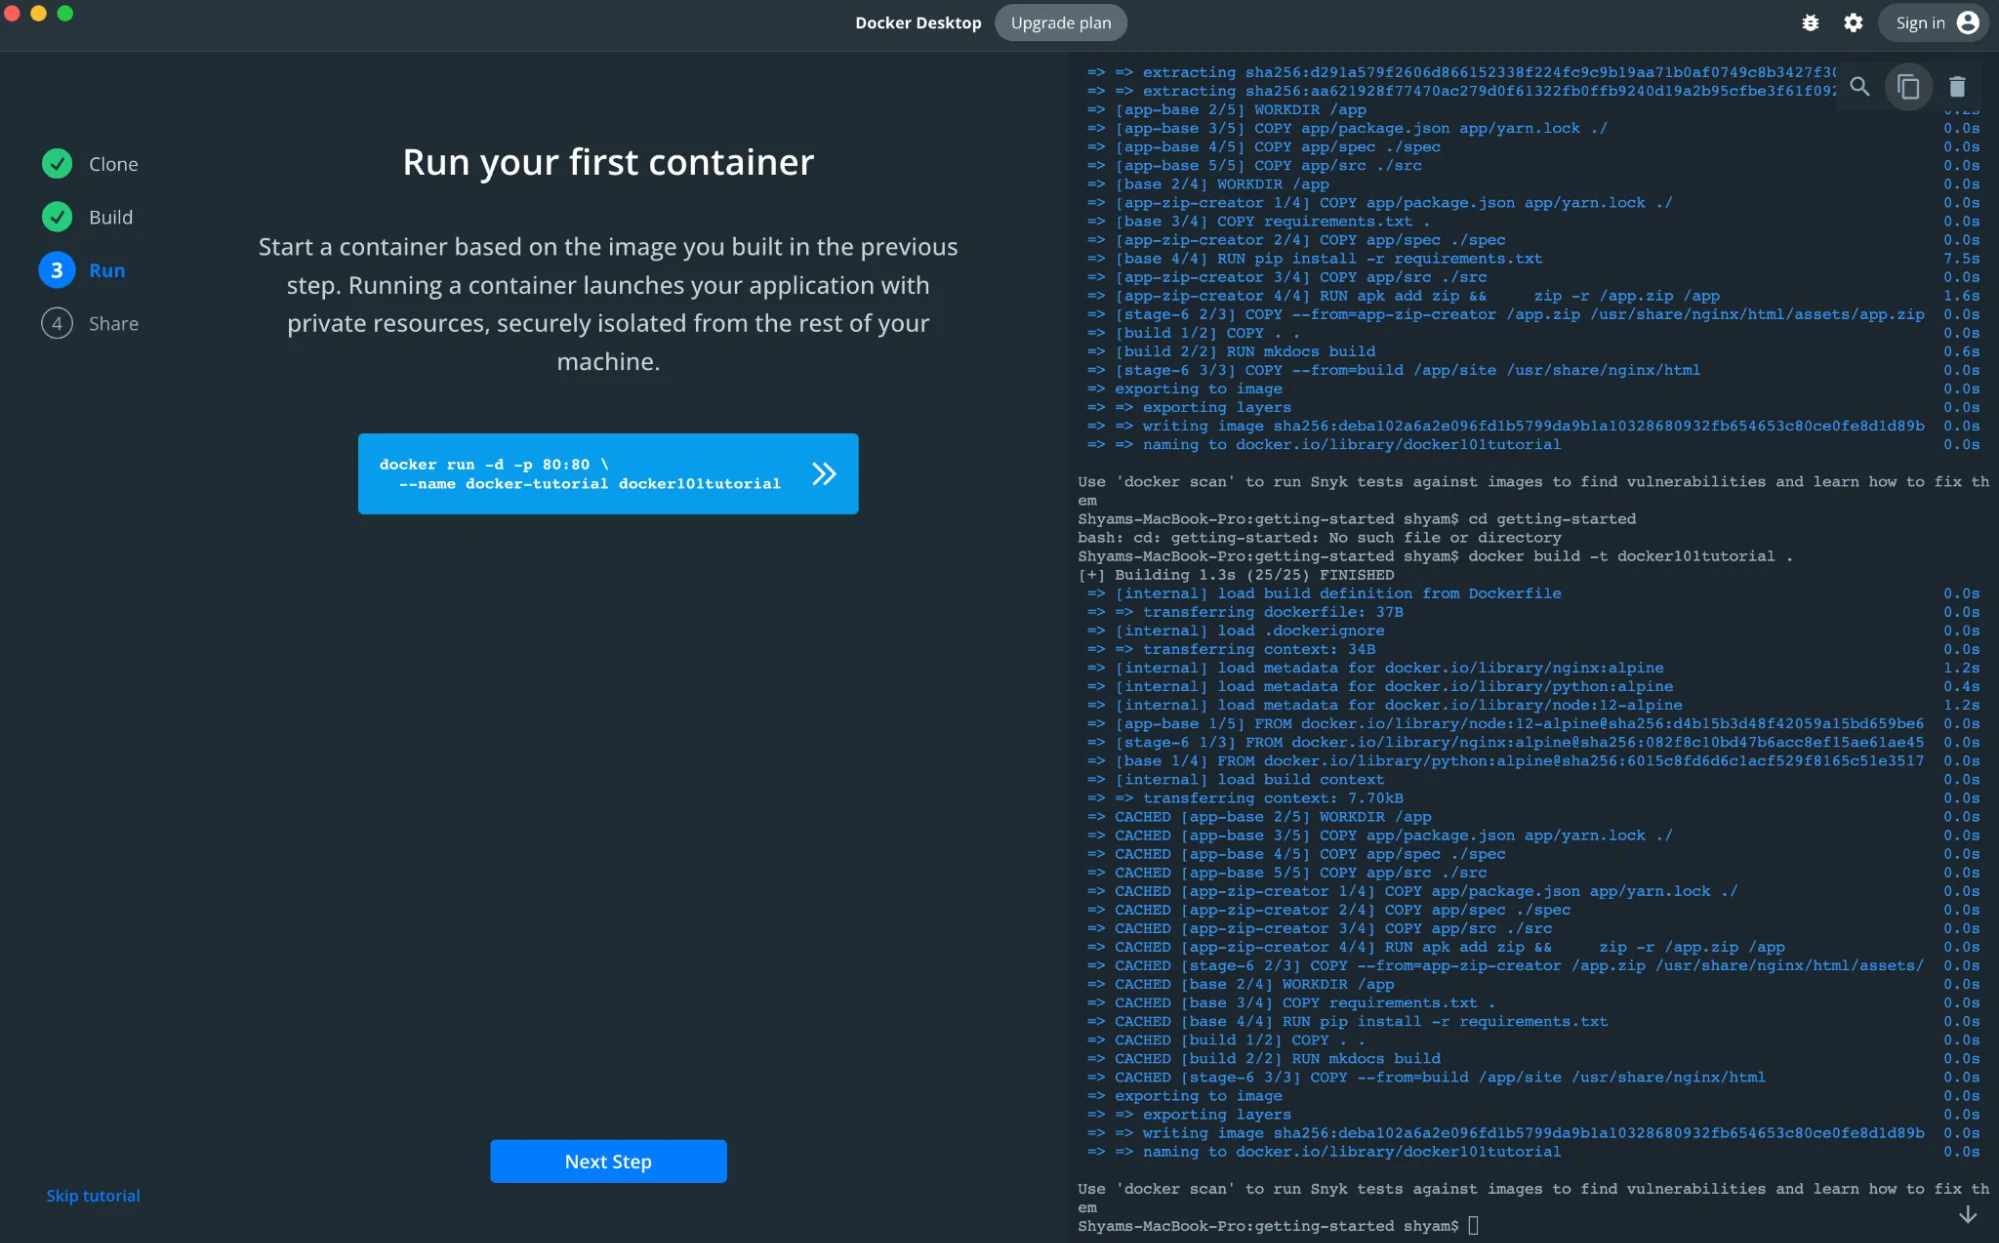
If you are running it on a terminal, you can run the below command:
$ docker run -d -p 80:80 –name docker-tutorial docker101tutorial
This will start the container and run the docker tutorial application on localhost. You should now be able to access the application on your browser.
Open your local browser and go to URL: http://localhost/tutorial/. You will see a screen similar to below:
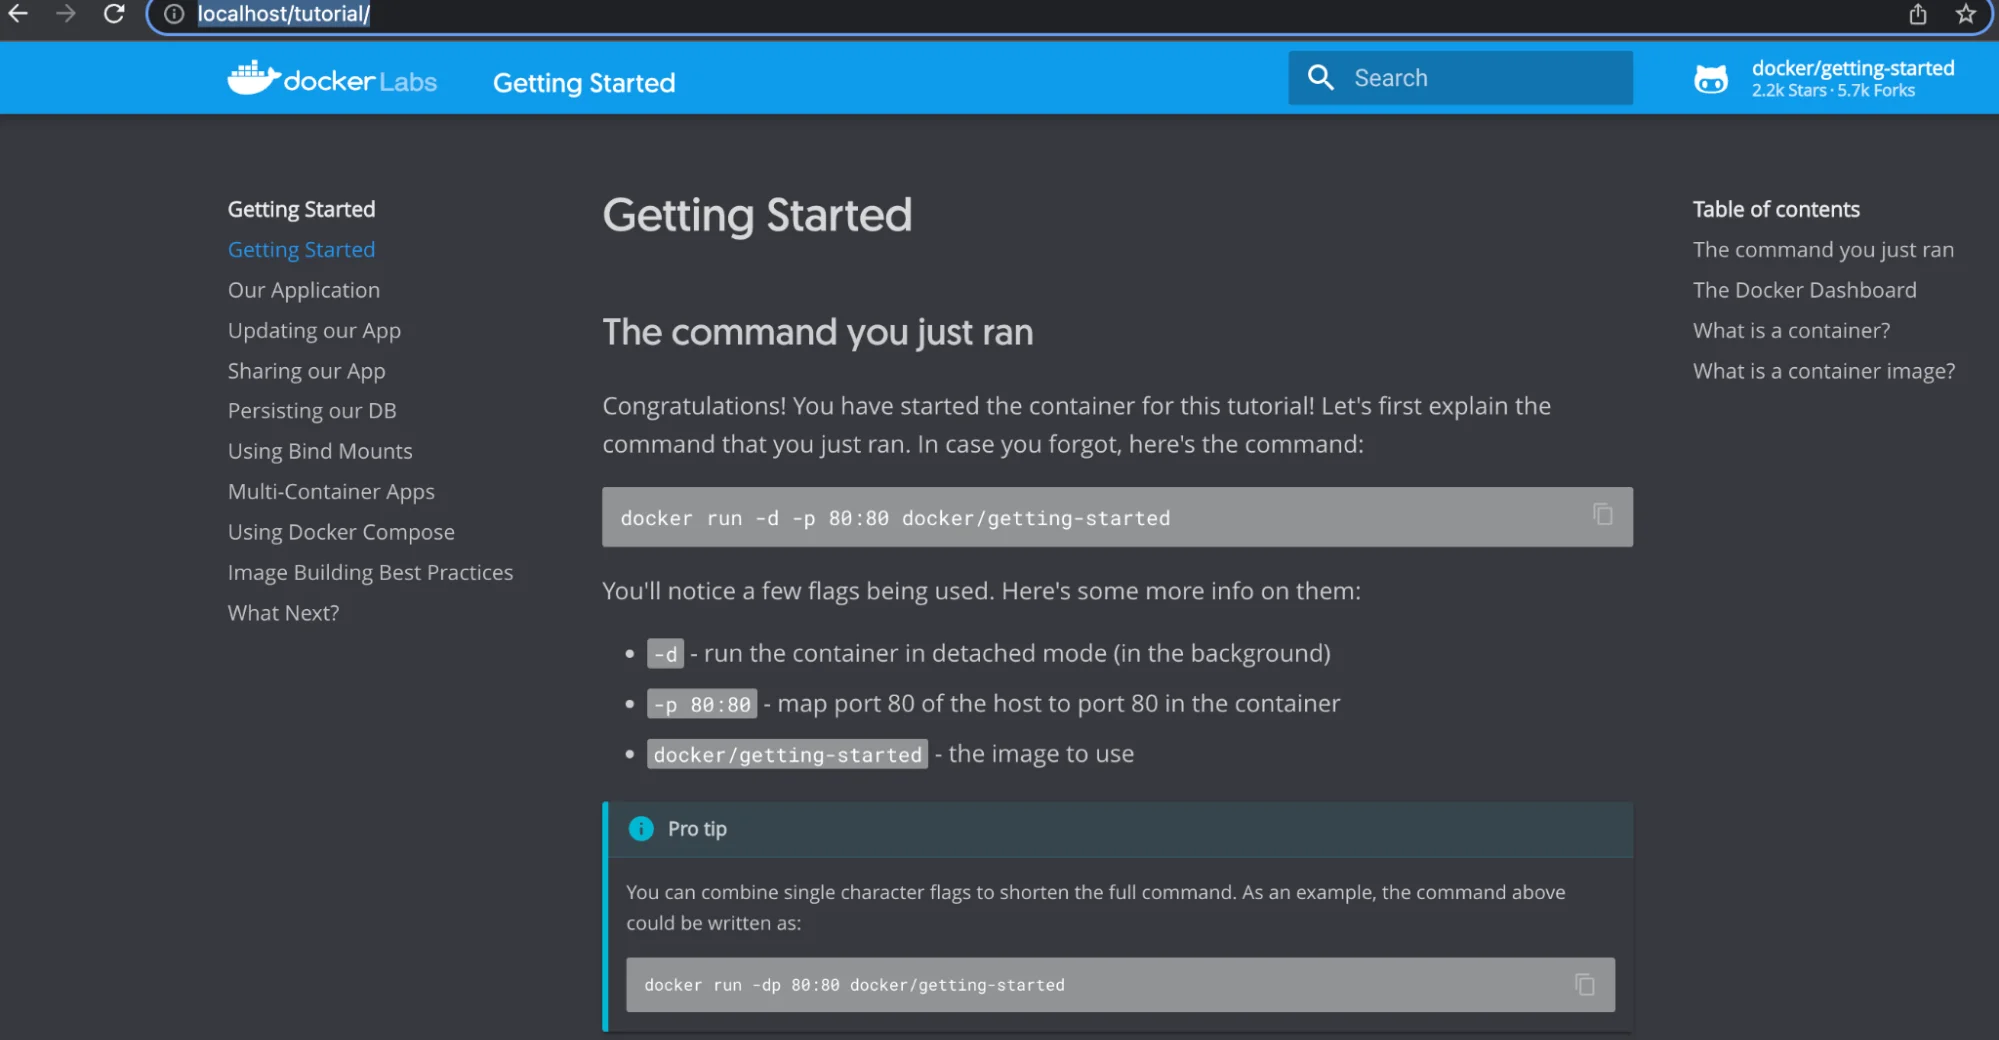
Congratulations! You have now run your first container image on docker. This is a full fledged application server nginx hosting a docker tutorial content, fully isolated from host OS.
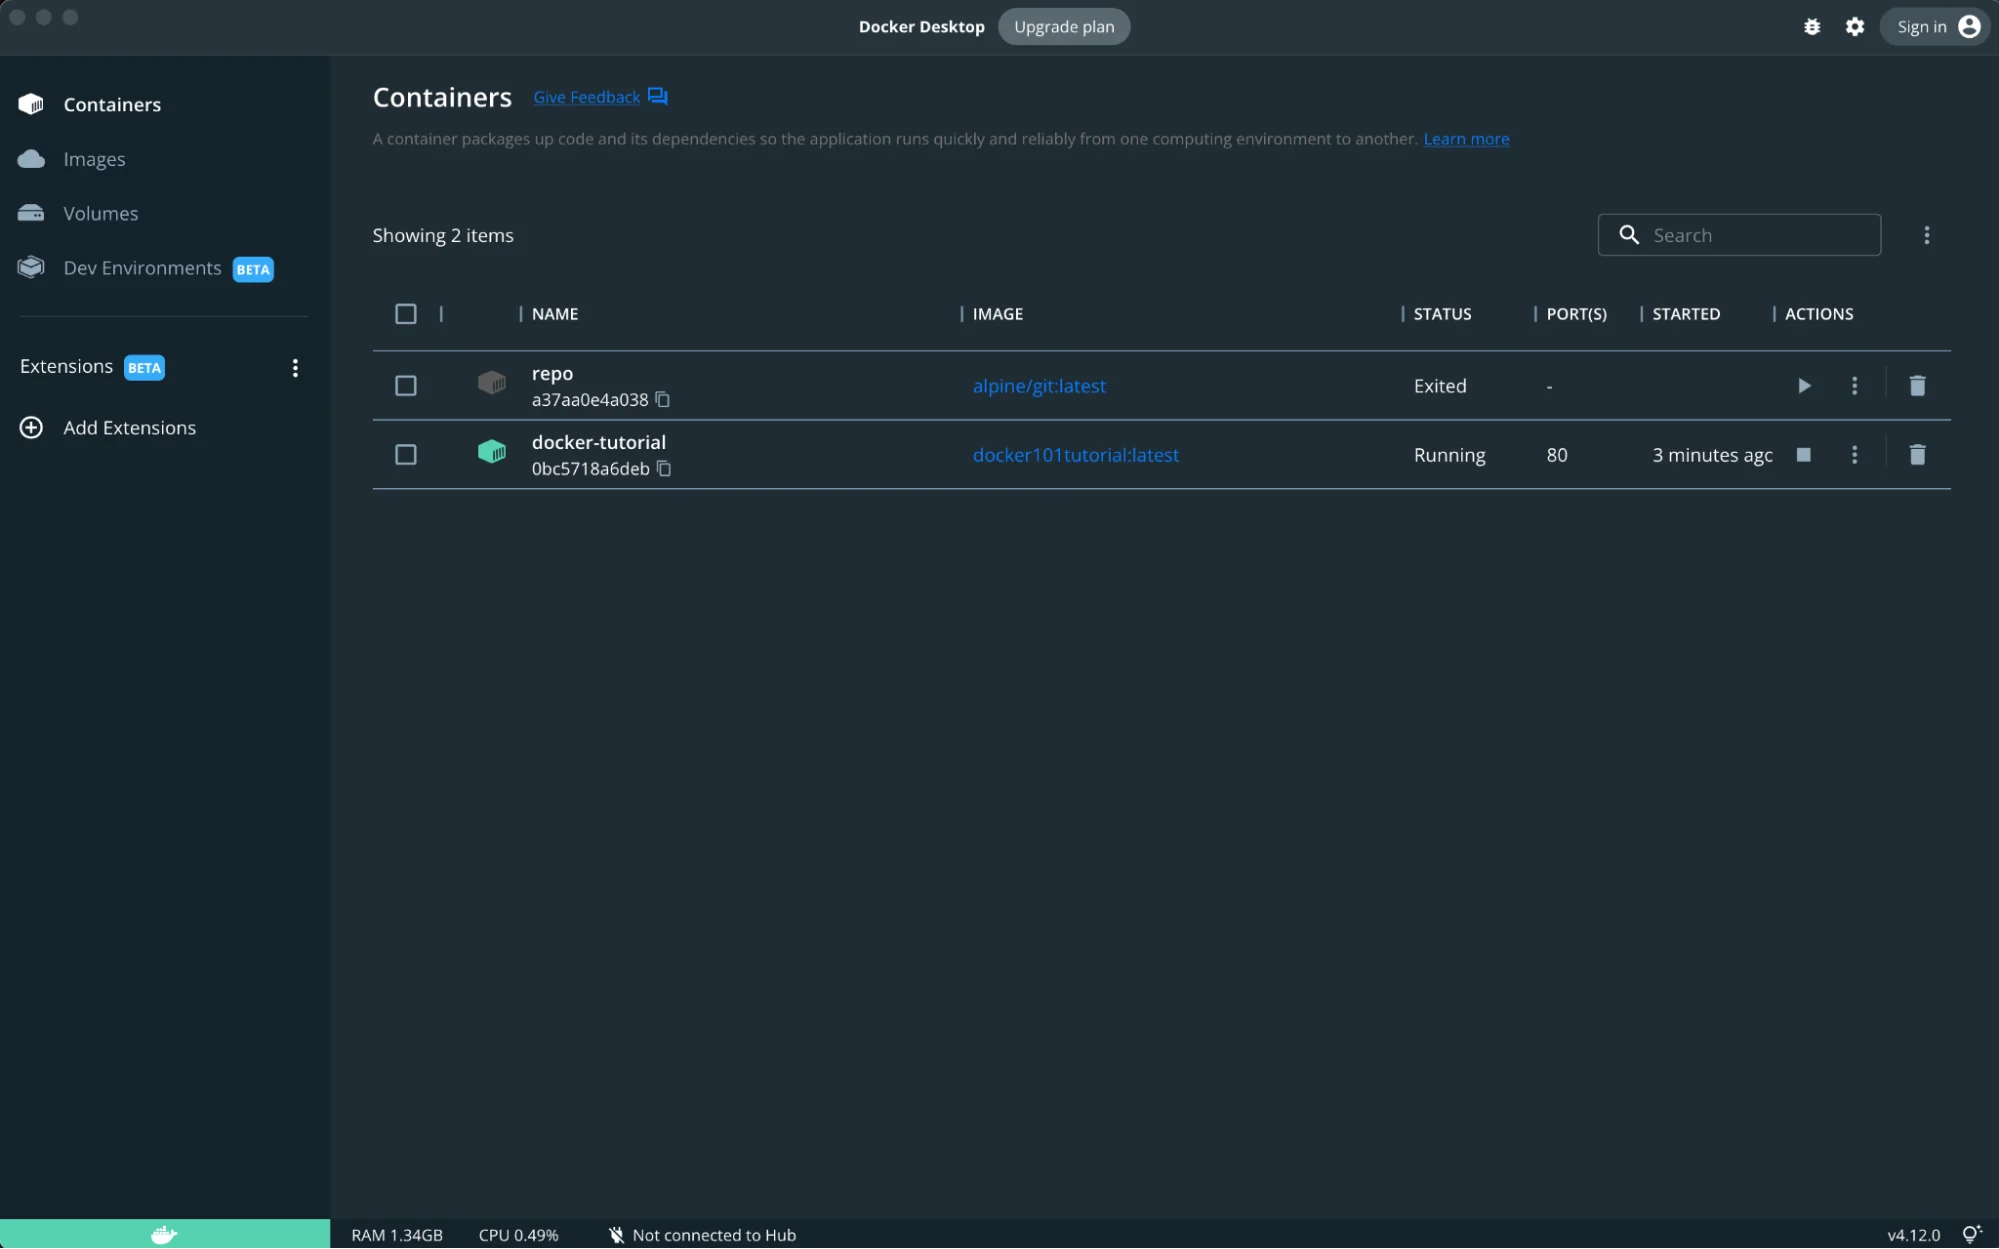
If you are using Docker Desktop, you can check the status of your containers and images in the main dashboard.
Troubleshooting errors
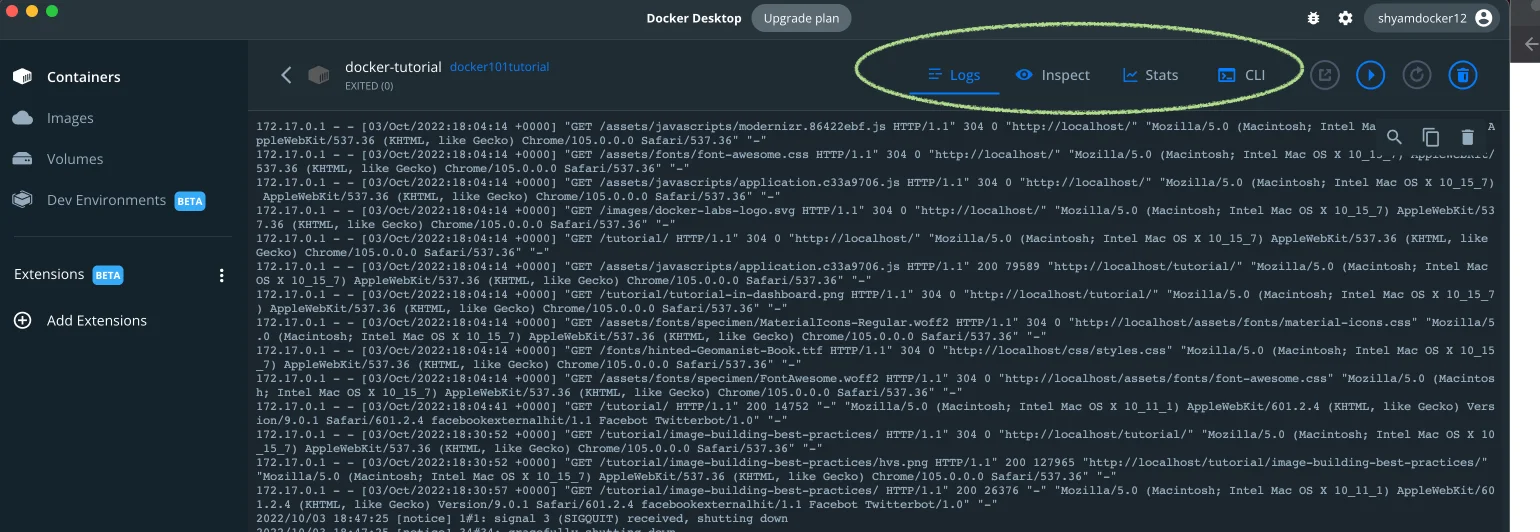
In case you have any errors during the execution of a container, you can check the logs and do other analysis by clicking on the container. Docker desktop provides many options to troubleshoot and other management controls.
When you click on the container, you will see a screen as below.
How to run other images from Docker Hub
The steps to run any docker image from Docker registry is pretty straightforward. By default, Docker Hub is the configured with docker. Once you pick the image you wish to run, copy the command you see on the right and execute it on your terminal window.
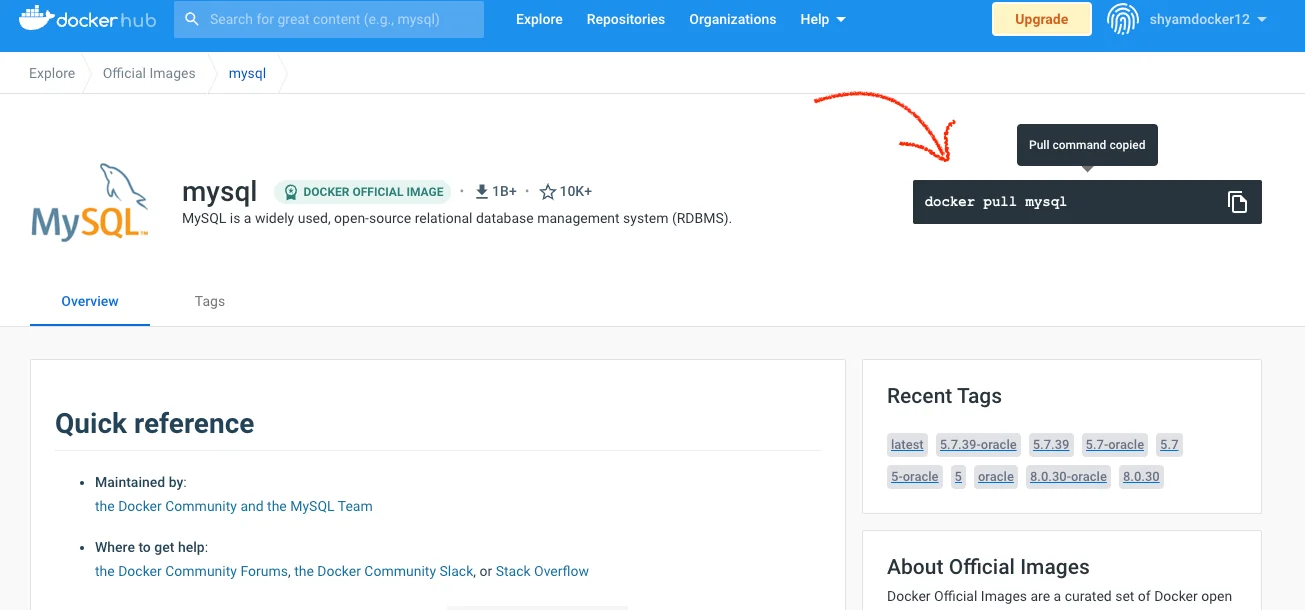
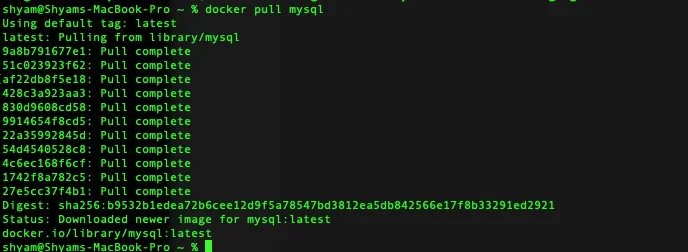
When you run the command “docker pull” mentioned in the Docker Hub page, it will download the image locally. You will see an output similar to what you see below.
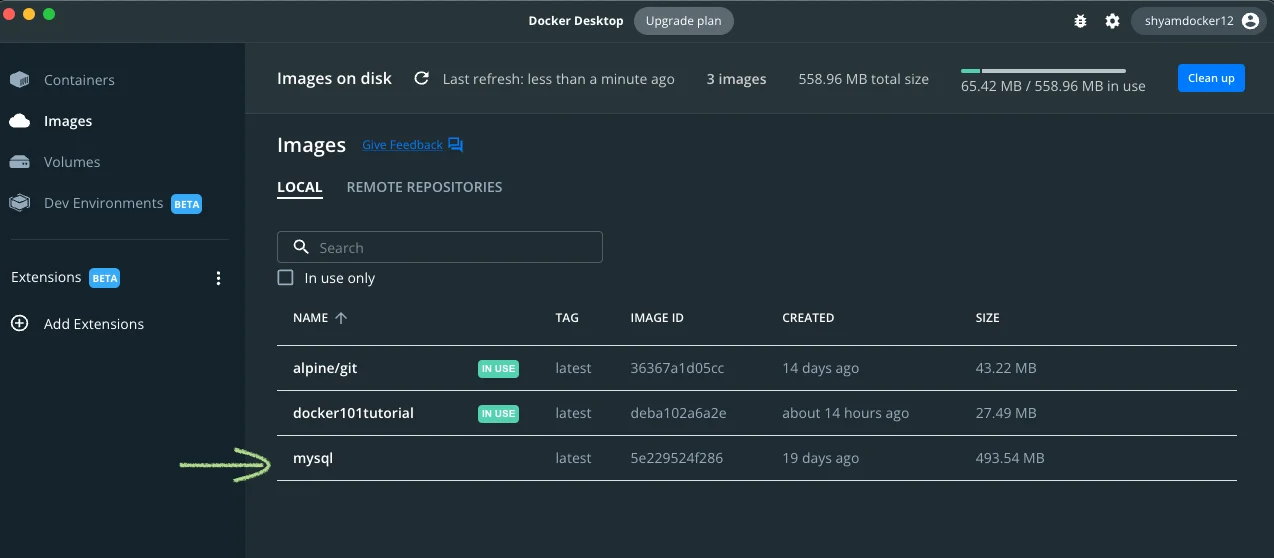
Once the download is complete, you will see the image in the list of local images in the Docker Desktop.
You can now run the container by clicking on blue “Run” button beside the image.
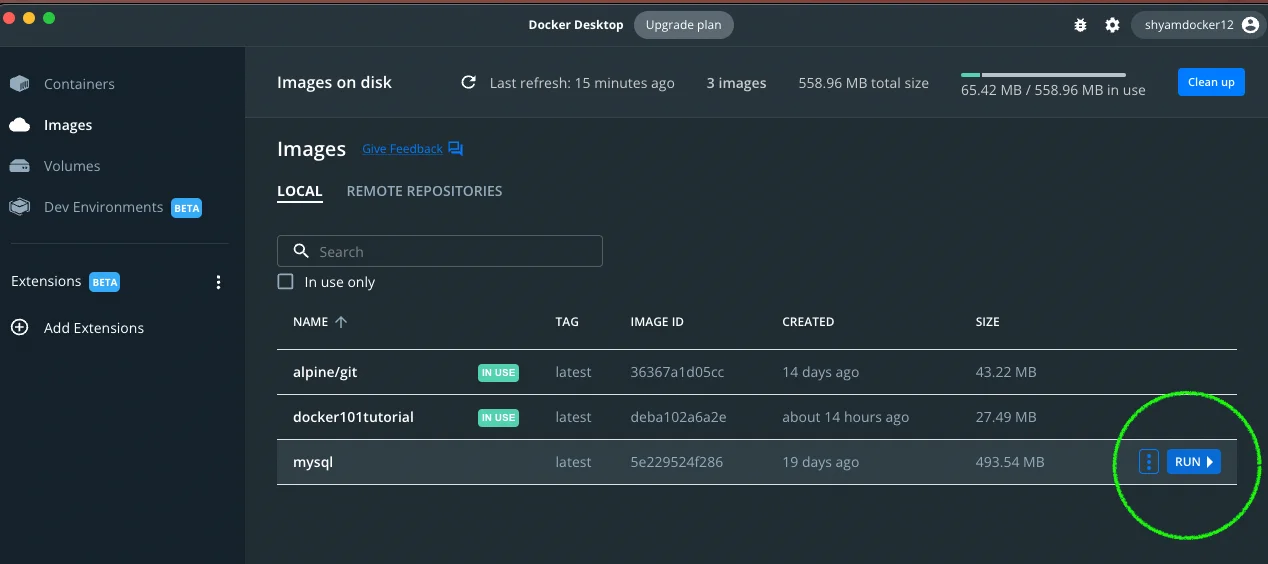
And that is it. That is how you can run any container image in Docker.
Creating your own docker image
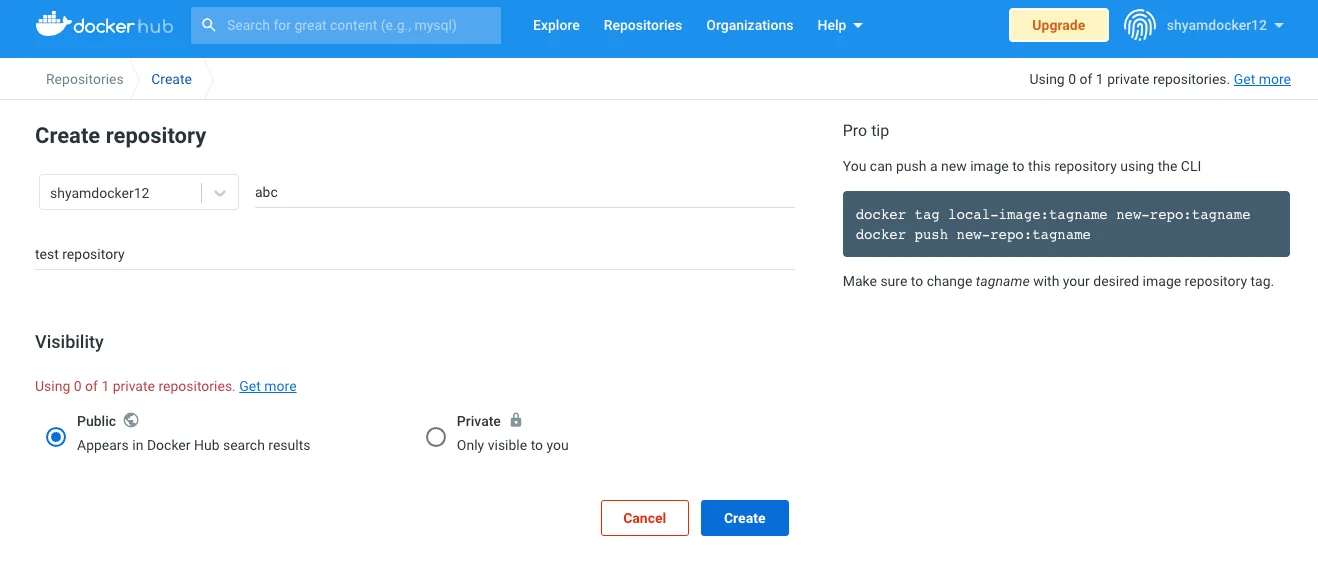
You can also create your own docker image and push it to Docker Hub. Start by logging into Docker Hub and go to Repositories > Create a repository.
Name your repo and give a description. Free account on Docker Hub allows only one private repo. You can create as many public repositories as you wish.
In the below example, we are creating a public repo called “abc”
This will create an empty docker repository.
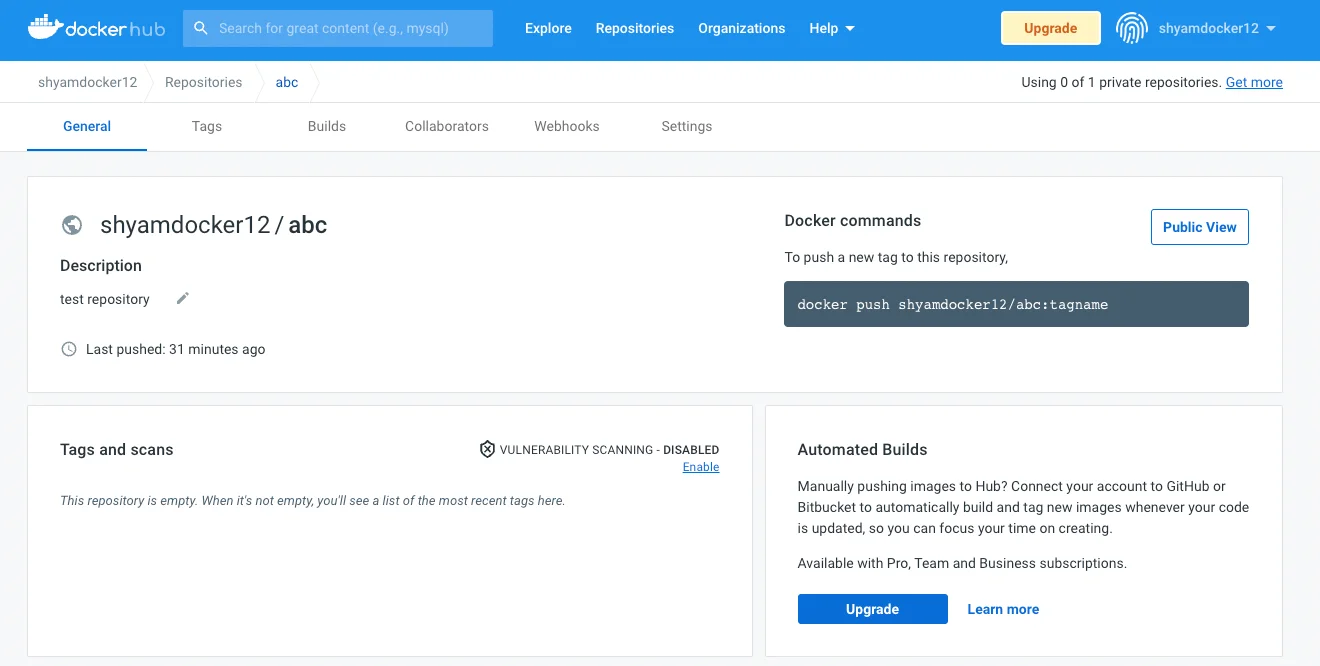
You can start filling this repository with image files, starting with a Dockerfile. Create a directory in your local machine to host your Dockerfile and write a simple hello world content inside the Dockerfile.
See a sample below:

Docker content we wrote was as follows:
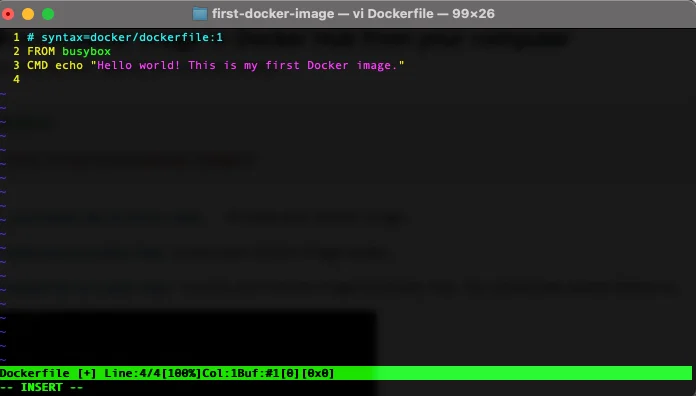
Once you have created this simple dockerfile. You can build the docker image with the Dockerfile using the below commands:
$ docker build -t <your-username>/<your-repo-name> .
This takes everything in the current directory and creates a docker image with dockerfile which is also in the current directory.
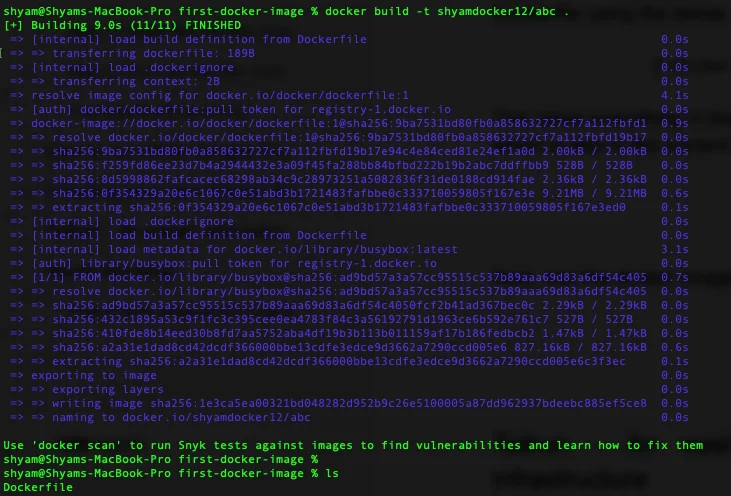
Next, test the docker image by running the image with docker run command.
$ docker run <your-username>/<your-repo-name>
If you open Docker Desktop, you will see the container listed in the list.
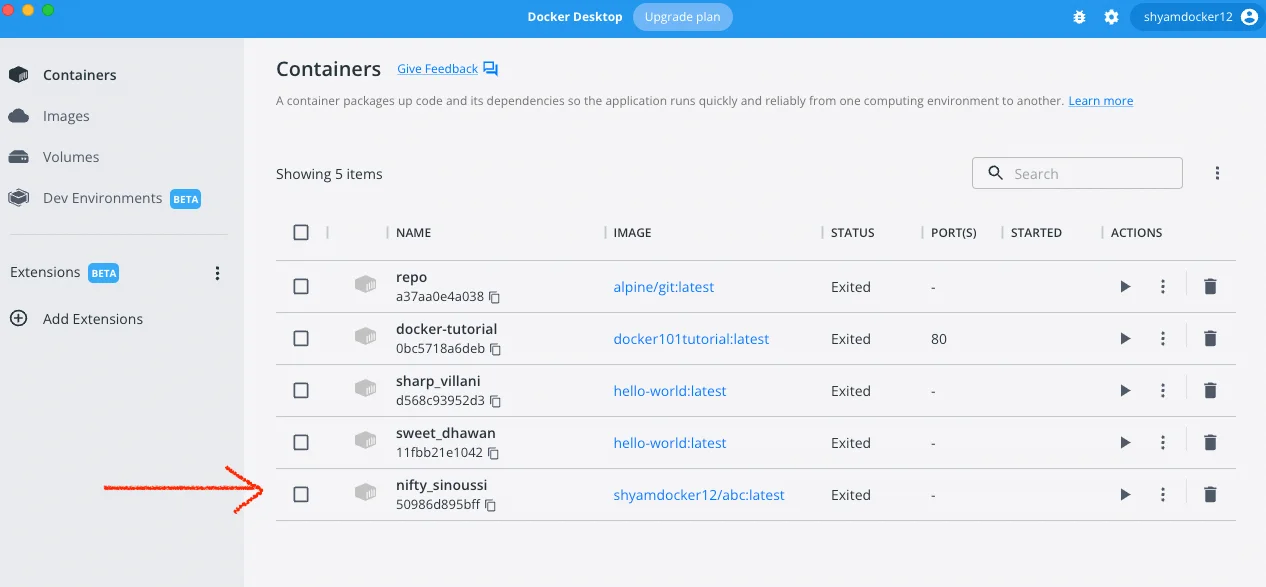
“latest” is the tag given to the image. Once you have tested your container, you can push your new container image to Docket hub with “docker push” command.
$ docker push <your-username>/<your-repo-name>
The output would look similar to below:

Congratulations! You have successfully created your own docker image and run it. The image is now uploaded to your Docker Hub account and it is available for the world to use.
You can go to Docker Hub and click on Repositories > your-reponame to see your docker image uploaded on the site.
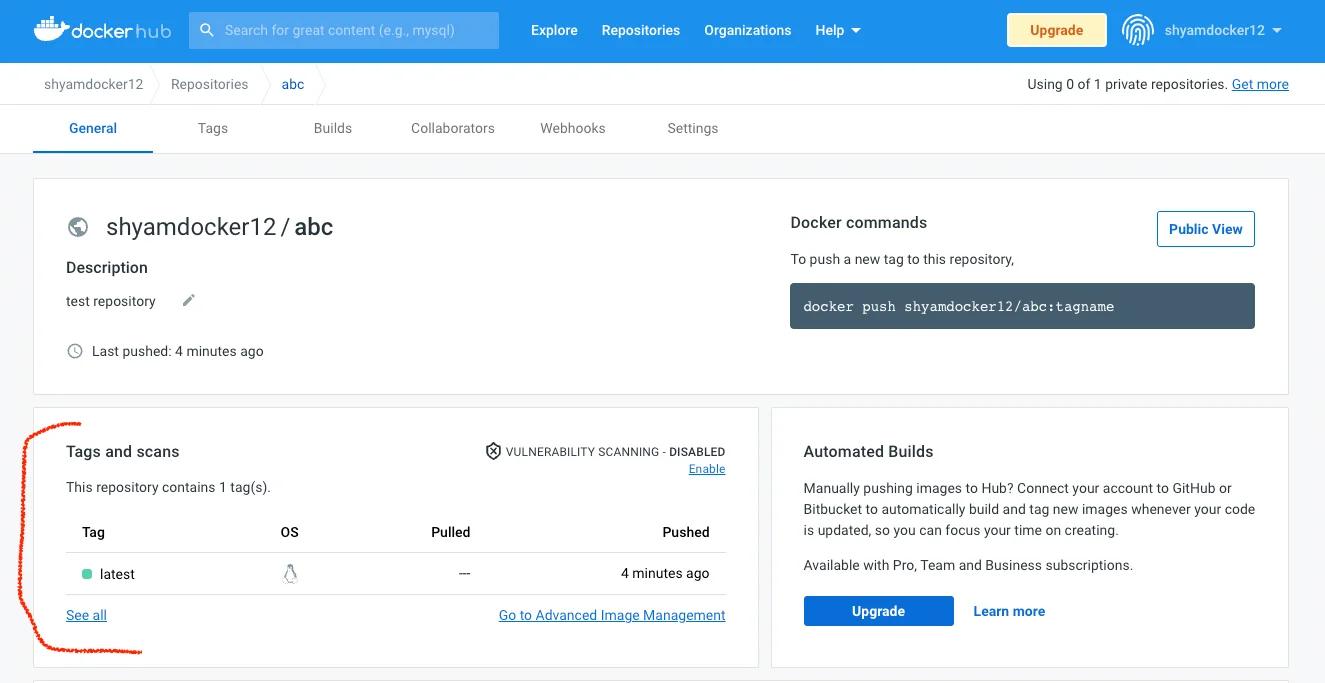
And that is how you create and run your own container image in Docker.
But no infrastructure runs one or two containers for any practical use. There are usually thousands of containers that run different parts of the system. Once you start running multiple containers, you will need a way to manage containers better.
Taikun – An easier alternative to manage your container infrastructure
Taikun provides a singular dashboard for all container orchestration across any kind of cloud. Taikun can be setup in private clouds, hybrid clouds or public clouds. It supports all major public cloud service providers like Google Cloud, Amazon AWS, Microsoft Azure and OpenStack.
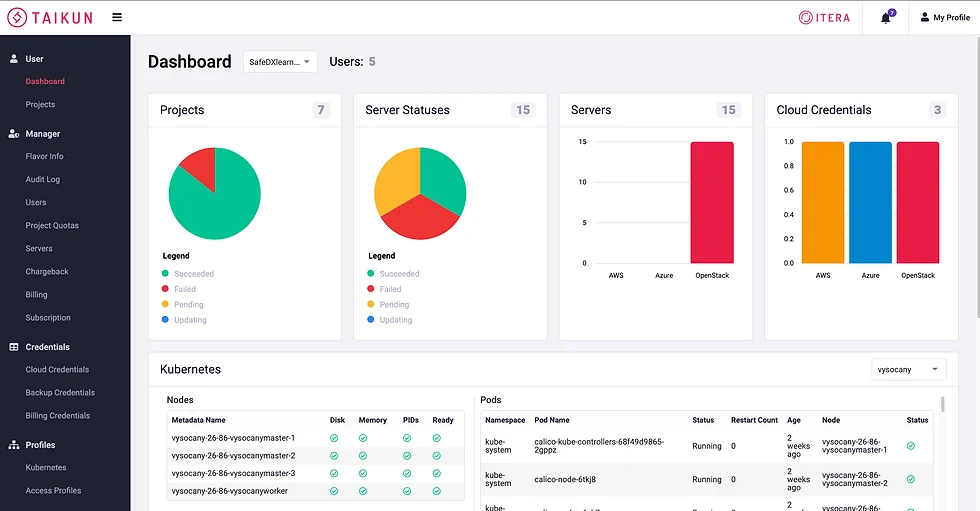
Taikun helps get container management right. Taikun to get ahead and leverage the power of containers quickly.


